Fall and Winter Landscape Lighting Maintenance Checklist
Quick Answer
To get your landscape lighting ready for fall and winter, turn off the power at the transformer, walk your property in daylight, and clear leaves and debris away from every fixture. Check for exposed or damaged wires, straighten any fixtures that have shifted, clean the lenses, and replace dim or burnt-out bulbs. Reset your timer when the clocks change in November, and mark fixtures near your driveway before the snow arrives. For anything electrical, like damaged wiring or a transformer that isn’t working, call a landscape lighting professional.
Fall sneaks up on us every year. One week you’re eating dinner on the patio, and the next it’s dark by six and the leaves are piling up in the garden beds.
This is the best time of year to give your landscape lighting a little attention. Once the snow starts, you’ll be busy clearing the driveway and booking your winter tire appointment. Your outdoor lights probably won’t make the to-do list. But an hour or two of care now can save you a repair bill in the spring.
Nite Time Décor has been designing, installing, and servicing landscape lighting in Oakville, Burlington, Mississauga, and the Hamilton area since 1998. Here’s the same checklist our technicians use, written so you can handle most of it yourself.
Why Fall Lighting Maintenance Matters
It protects your investment
Your lighting system adds curb appeal, makes your home safer, and lets you enjoy your yard after dark. Like anything that sits outside all year, it needs some care. Many of the problems we fix in the spring, such as crushed fixtures, corroded connections, and cut wires, could have been caught with a quick check in the fall.
It helps keep your family safe
By December, the sun sets before 5 p.m. in Oakville. That means you’re coming home, walking the dog, and taking out the garbage in the dark. Add ice and snow, and good pathway and step lighting becomes a real safety feature. A well-kept system lights up the places where people are most likely to slip or trip, and it helps create a more safe and secure home.
Ontario winters are tough on outdoor equipment
Our winters bring freeze-thaw cycles that can push fixtures out of the ground, road salt that can corrode metal near the driveway, and snowblowers and plows that don’t know where your pathway lights are. A little prep in the fall goes a long way. For more ideas, read our tips to protect your landscape lighting from the elements.
Before You Start: Turn Off the Power
Most home landscape lighting runs on a low-voltage system powered by a transformer, which usually plugs into an outdoor outlet. Turn the transformer off or unplug it before you clean, adjust, or touch anything. Low voltage is much safer than household current, but wet hands and wet ground are never a good mix with electricity.
Your Fall and Winter Landscape Lighting Checklist
Here’s the full list at a glance. We explain each step below.
Do a daytime walk-around
Clear leaves, mulch, and debris
Trim back plants and branches
Check for exposed or damaged wires
Straighten and re-aim fixtures
Clean lenses and fixture housings
Replace dim or burnt-out bulbs
Check the transformer
Reset your timer
Mark fixtures near driveways and walkways
Test the whole system after dark
1. Do a daytime walk-around
Pick a dry afternoon and walk your whole property. Look at every fixture, every visible stretch of wire, and the transformer. Bring your phone and snap a photo of anything that looks wrong. If you end up needing a service call, those photos help our technicians come prepared.
2. Clear leaves, mulch, and debris
Fallen leaves pile up against ground fixtures and trap moisture, which can lead to corrosion on the fixture and the wiring. Clear away leaves, mud, mulch, and anything the local critters have dragged in.
For higher fixtures, brush away cobwebs and old bird nests. If you find a wasp nest, be careful. It’s often safest to wait for a cold night when the wasps are inactive, or call a pest control company.
If you still have older halogen bulbs, this step matters even more. Halogens run hot, and dry leaves or mulch resting against them can be a fire risk. LED bulbs run much cooler.
3. Trim back plants and branches
Trees and shrubs can grow a lot in one season. Trim back any branches or leaves that block your lights or press against the fixtures. This lets each light do its job, and it gives you room to finish the rest of the checklist. Our pruning tips for landscape lighting explain what to trim and when.
4. Check for exposed or damaged wires
Over the summer, wiring can work its way to the surface from lawn aeration, garden edging, digging, or animals. Look for wires that are exposed, cut, or chewed.
Damaged wiring is a safety risk, especially if you have kids or pets, and winter weather will only make it worse. Please don’t just tape it up and hope for the best. Contact Nite Time Décor and one of our technicians will repair or replace the damaged wire.
5. Straighten and re-aim fixtures
Lawn mowers, foot traffic, and backyard games can knock fixtures out of place over the summer. Straighten any that are leaning and tighten the mounts where you can. Look closely for cracked housings or broken parts, since those may need replacement parts.
Then come back after dark to check the aim. A light that’s off by a few degrees can shine into someone’s eyes or light up your neighbour’s window instead of your maple tree. Good aiming also helps reduce light pollution.
6. Clean lenses and fixture housings
Dirty lenses can noticeably dim your lights. In most cases, warm soapy water and a soft cloth are all you need. Skip abrasive pads and harsh cleaners, since they can scratch the lens or damage the finish. Light scratches can sometimes be buffed out, but a lens that’s badly scratched or cloudy should be replaced.
If your lights aren’t as bright as they used to be, it may be time for new bulbs. This is also a great time to switch to LED if you haven’t already. Just make sure the new bulb is compatible with your fixture. Learn more about the benefits of LED outdoor lighting.
8. Check the transformer
With the power off, open the transformer cover and clear out any dirt, leaves, or insects. Make sure the wire connections on the terminal block are snug. Now’s also a good time to replace batteries in any timers or motion sensors.
If you notice scorch marks, a burning smell, buzzing, or an outlet that keeps tripping, stop there and call a professional.
9. Reset your timer
Daylight saving time ends on the first Sunday in November. If your system uses a manual timer, reset it so your lights come on when it actually gets dark. If you have a photocell or an astronomical timer, it will adjust on its own. Just make sure leaves or snow aren’t covering the photocell sensor. If your lights are controlled by an app, check the schedule there.
10. Mark fixtures near driveways and walkways
Before the first snowfall, place snow stakes or reflective markers next to fixtures along your driveway and paths. If you use a snow removal company, show them where your lights are. It’s one of the easiest ways to avoid a crushed fixture come March.
11. Test the whole system after dark
Turn the power back on and walk your yard at night. Is every light working? Is the brightness even? Flickering can mean a loose connection. If your system was installed by Nite Time Décor, check our warranty before paying for any repairs.
Adjust Your Lighting for the Winter Landscape
Your yard looks very different once the leaves come down. Lighting that looked great on summer foliage can look harsh on bare branches, unless you’re going for a haunted house look. A few simple changes can make your winter lighting look intentional.
Light the bare trees. Aim uplights at the trunk and branch structure of your deciduous trees. Their silhouettes can cast beautiful shadows on the walls of your home.
Shift the focus. Highlight evergreens, winter planters, and features like a fire pit that get overlooked in the summer. A cool white or soft blue light on an evergreen looks especially nice against the snow.
Turn off what you can’t see. Lights aimed at garden beds that are now dormant or buried in snow can be switched off or re-aimed for the season.
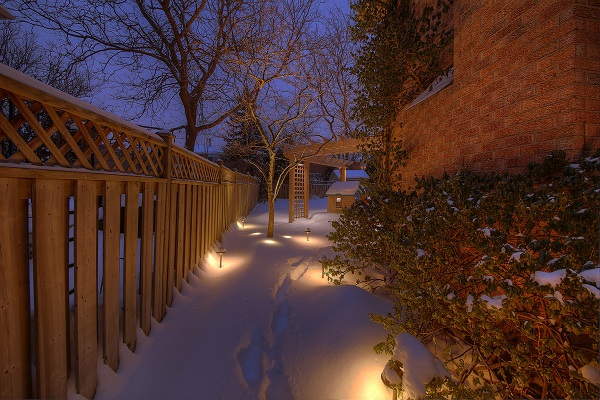
Think about where the snow goes. Snow hides the edges of paths and steps. Make sure your pathway lights clearly show people where to walk, even when everything is white.
Looking for some holiday sparkle? Our sister company, Christmas Décor of Oakville, installs professional holiday lighting along rooflines, railings, and trees, and takes it all down again after the season.
Is It Time to Upgrade Your Landscape Lighting?
Outdoor fixtures get tired, just like anything else. If your system has been in place for years, fall is a great time to replace worn fixtures, fill in dark spots, and switch the rest of your bulbs to LED.
LED landscape lights use far less energy than halogen or incandescent bulbs, run much cooler, and last a lot longer. Many quality LED lamps are rated for tens of thousands of hours, which can mean well over a decade of normal use. They also perform very well in cold weather. Explore our residential landscape lighting services or commercial lighting services to see what an upgrade could look like.
A note on cast bronze fixtures
Cast bronze is strong, resists corrosion, and holds up well to cold, wet weather. Over time it develops a natural patina, anywhere from a deep brown to a greenish blue. Winter speeds that process up, so by spring your fixtures can look like they’ve always been part of the home.
If you’d rather keep the original finish, fall is the time to apply a protective coating. Some homeowners use a light coat of WD-40 or a clear matte sealant. Check with your fixture’s manufacturer first to see what they recommend.
When to Call a Professional [NEW]
Most of this checklist is easy to do yourself. Give us a call if you notice any of the following:
Exposed, cut, or chewed wires
A transformer that’s buzzing, scorched, or not turning on
A whole section of lights that won’t come on
Lights that still flicker after you’ve replaced the bulb
You’d like to redesign or expand your system
Our team has more than 25 years of experience keeping landscape lighting systems running across Oakville, Burlington, Mississauga, Halton, and Hamilton. Request a quote or book a service call at 1-800-952-3006.
The best time is late October to early November, after most of the leaves have fallen but before the first snowfall. A second quick check in the spring will catch any damage from the winter.
No. Low-voltage LED landscape lighting is designed to run all year, and winter is when you need it most for safety. You can switch off individual lights that end up buried in snow or aimed at dormant garden beds.
Snow on its own rarely damages quality outdoor fixtures. The bigger risks are snowplows, snowblowers, shovels, ice buildup, and road salt. Marking your fixtures and keeping them clear of salty snow piles will prevent most winter damage.
Turn off the power first. Then wipe the lenses and housings with warm soapy water and a soft cloth. Avoid abrasive pads and harsh chemicals, and follow your manufacturer's care instructions.
The most common causes are a burnt-out bulb, a loose connection, a damaged wire, a tripped GFCI outlet, or a timer or photocell problem. Check the outlet and the bulb first. If that doesn't fix it, call a technician.
We recommend a quick DIY check each spring and fall, plus a professional inspection about once a year. Regular care helps your system last longer and catches small problems early.
Yes, for basic tasks like clearing debris, cleaning lenses, re-aiming fixtures, and changing bulbs with the power off. Leave wiring repairs and transformer problems to a professional.
Basic care like cleaning and clearing debris won't affect your warranty. If your system was installed by Nite Time Décor, check your warranty coverage before arranging any repairs.
Overgrown plants are one of the most common — and most overlooked — reasons a landscape lighting system underperforms. When shrubs, trees, and ground cover are allowed to grow unchecked, they block fixtures, redirect beams, and cast unwanted shadows that were never part of the original design. Regular pruning — thinning, raising, and cleaning your plants through the growing season — keeps your lighting performing exactly as it was designed to. In Ontario, late summer and early fall are the most critical pruning windows for protecting your landscape lighting investment heading into winter.
Over the past 25+ years, the team at Nite Time Decor has designed and installed landscape lighting systems for hundreds of homes and businesses across Oakville, Burlington, Mississauga, and the Halton and Hamilton regions. And in that time, we’ve noticed a pattern: a year or two after installation, clients call to report that something seems wrong with their lighting. A fixture that should be bright has dimmed. A beam that used to illuminate a beautiful tree now seems to disappear. There are shadow spots where there weren’t before.
In most cases, the culprit isn’t the fixture or the bulb. It’s the garden.
Plants grow. And in Ontario, they grow fast — particularly through the long days of summer. Without consistent pruning, even a well-designed lighting system can be gradually smothered by the very landscape it was meant to showcase. This guide walks through exactly how to prune for effective landscape lighting — what to do, when to do it, and why late summer and early fall are your most important windows. For additional seasonal guidance, see our Fall and Winter Landscape Lighting Maintenance Checklist.
Why Pruning is Essential for Your Landscape Lighting System
A landscape lighting design is a precise thing. Every fixture is positioned to achieve a specific effect — uplighting a specimen tree, washing a garden bed with soft ambient light, grazing a stone wall to reveal its texture. That precision depends on unobstructed sightlines between the fixture and its target. When those sightlines are compromised by growth, the design breaks down.
The most common lighting problems caused by overgrowth include:
Fixtures buried or partially covered by spreading ground cover — the light output drops dramatically and the beam direction is altered
Shrubs growing in front of uplights — instead of illuminating the plant from below, the fixture now illuminates the back of the shrub from inside
Tree canopies expanding to block moonlighting or downlighting fixtures — areas that were once well-lit are now in shadow
Dense foliage diffusing and scattering light that should be focused — creating flat, underwhelming illumination instead of the depth and drama the design intended
Dead or dying branches casting permanent shadow spots on features they’re supposed to frame
The good news: all of these issues are entirely preventable with a consistent pruning routine tied to your landscape lighting maintenance plan.
The Benefits of Pruning Go Beyond Your Lighting
It’s worth noting that pruning for your landscape lighting isn’t just about the lighting. A good pruning regimen produces healthier, more beautiful plants — which in turn makes your landscape lighting more effective.
Think of it this way: a dense, overgrown shrub with weak, woody interior growth and a mass of tangled outer branches is far less beautiful than a well-shaped, healthy plant with clear structure and strong growth. When your lighting illuminates that healthy, well-pruned plant, the result is dramatically better — cleaner lines, more interesting shadow play, better colour rendering from the foliage.
Pruning also removes the dead and dying material that accumulates in any plant through the growing season. Dead branches block light, create fire hazard near fixtures, and harbour disease and pests that can spread through the garden. According to Landscape Ontario, regular pruning is one of the most important practices for maintaining plant health and longevity in Ontario’s challenging climate.
When to Prune in Ontario for Best Results
Early Spring — The Primary Pruning Window
The most impactful pruning happens in early spring, just before the growing season begins. At this point, plants are still dormant or just emerging, which means they’re not actively using energy for growth or flowering. Pruning now allows plants to redirect their energy into strong new growth rather than repairing cuts made during active growth periods.
Spring is also when last year’s winter damage becomes visible — frost-cracked bark, winter-killed branch tips, and broken limbs that need to be removed before they become entry points for disease.
Late Summer and Early Fall — The Critical Maintenance Window
Late August through early October is the second most important pruning window — and the one most relevant right now for Ontario homeowners. By late summer, this season’s growth has had months to develop, and the plants that were carefully pruned in spring have often expanded significantly.
This late summer and early fall window matters for landscape lighting for several specific reasons:
Summer growth has reached its peak — by late August, most Ontario plants have completed their primary flush of growth. Pruning now shapes the plant heading into fall without stimulating new tender growth that frost could damage.
It’s your last clear opportunity before winter — once leaves drop and temperatures fall, working visibility in the garden decreases and plant access becomes more difficult. Getting pruning done now means your lighting performs optimally through the fall season and is well-positioned for spring.
Fall is when landscape lighting gets its most use — as days shorten through September and October, your outdoor lighting runs for more hours each day. Having it performing at its best right now matters.
Fixture access and adjustment — late summer pruning allows your lighting maintenance professional to clearly see and access all fixtures, verify their positioning, and make any adjustments before the season ends.
Throughout the Season — Ongoing Maintenance
Beyond the primary spring and late summer pruning, a light ongoing maintenance routine through the growing season keeps your lighting performing consistently. Monthly walkthroughs to remove dead branches, clear debris from fixture bases, and trim back any aggressive growth that’s directly interfering with a fixture are enough to prevent the gradual buildup that causes larger problems.
How to Prune for Landscape Lighting: The Three Techniques
1. Thinning
Thinning removes selected branches from throughout the plant’s canopy to reduce its overall density without significantly changing its size or shape. Think of how a hairdresser thins out thick hair — the overall length and form are preserved, but the weight and density are reduced.
For landscape lighting, thinning accomplishes two important things:
It creates openings through which light can penetrate into and through the plant rather than simply bouncing off the outer surface
It removes the interior deadwood that accumulates in dense shrubs and trees, improving plant health and eliminating shadow-casting debris
Important: when thinning, never remove more than 25% of a plant’s foliage in a single session. This is consistent with guidance from organizations like Watersheds Canada and widely accepted horticultural practice. Removing more than this in one pass stresses the plant and can cause a flush of weak, unattractive regrowth.
For older, mature trees, thin more conservatively than you would a younger plant. Older trees have less energy reserves and recover more slowly from significant pruning.
2. Raising
Raising involves removing the lower branches of trees and the lowest growing branches of larger shrubs to increase ground clearance. This is particularly important for ground-level and near-ground fixtures — uplights, path lights, and in-ground fixtures — that can be obscured by low-growing material.
As shrubs mature, their lowest branches often spread outward and downward, eventually covering the ground around the plant base. Fixtures installed in this zone can be completely buried within a few growing seasons. Raising clears this ground plane and restores the fixture’s field of view.
Always make raising cuts just outside the branch collar — the slightly raised ring of tissue at the base of each branch where it meets the trunk or parent stem. Never cut flush against the trunk, and never leave a stub. Both errors prevent proper healing.
3. Cleaning
Cleaning is the most straightforward of the three techniques: removing dead, diseased, damaged, or weak branches from the plant. This is good horticultural practice in general, but it’s particularly relevant for landscape lighting because dead material in or near a plant creates persistent shadow spots and can be a fire risk near hot fixtures.
When cleaning, remove:
Dead branches — brown, brittle, with no live buds or green tissue when the bark is scratched
Diseased branches — discoloured, distorted, or showing signs of fungal infection or pest damage
Crossing and rubbing branches — two branches growing against each other create wounds and are a disease entry point
Water sprouts and suckers — weak, fast-growing vertical shoots that rarely contribute to plant aesthetics and grow quickly enough to interfere with lighting
Fixture-Specific Pruning Considerations
Uplights and Spotlights
Ground-mounted uplights and spotlights are most vulnerable to being obscured by spreading ground cover and the lower branches of the plants they’re designed to illuminate. Check these fixtures specifically: the fixture lens should be clear and unobstructed, and the beam path to the target should be open. If a shrub has grown to the point where the fixture is illuminating the underside of the lowest branches rather than the face of the plant, raise the plant and redirect the fixture.
Path Lights
Pathway lighting can be overrun by ground-covering perennials, spreading ornamental grasses, and low-growing shrubs surprisingly quickly. These fixtures depend on their lenses being at or above the foliage line to cast light effectively across the path. When path lights disappear into the garden, they lose both their safety function and their aesthetic contribution. Keep a clear zone around path light fixtures and trim back any growth that’s beginning to crest the fixture height.
Moonlighting and Downlighting in Trees
Fixtures mounted in tree canopies for moonlighting effects depend on the canopy structure remaining consistent with what was in place when the fixture was positioned. As trees grow and canopies expand, fixtures can shift out of position or become obscured by new branch growth. An annual check of tree-mounted fixtures — ideally by your landscape lighting maintenance provider who has the equipment to work at height safely — ensures these fixtures are still aimed correctly and that the tree’s growth hasn’t altered the intended effect.
Why Oakville and Burlington Homeowners Trust Nite Time Decor
Nite Time Decor has been designing, installing, and maintaining landscape lighting for homeowners and businesses across Oakville, Burlington, Mississauga, and the Halton and Hamilton regions since 1998. In that time, we’ve learned that a landscape lighting system is not a one-time installation — it’s an ongoing relationship between the lighting design, the plants, and the seasons.
Here’s what that means in practice when you work with Nite Time Decor:
25+ Years of Local Experience
We understand Ontario’s growing season, its plant species, and the specific ways that Halton Region’s climate interacts with both landscape plants and outdoor lighting equipment. When we design a lighting system, we design it with growth in mind — positioning fixtures and planning plant sightlines based on how the garden will look in 3, 5, and 10 years, not just today.
A Complete Service and Maintenance Program
Our service and maintenance program covers everything your landscape lighting system needs to perform at its best year after year — fixture inspection and cleaning, bulb and component replacement, beam adjustment, and guidance on pruning for lighting effectiveness. We identify problems before they become expensive and make recommendations that extend the life of your system.
Award-Winning Design
Nite Time Decor has been recognized with multiple Landscape Ontario Awards of Excellence for landscape and holiday lighting. Our design team approaches every property with the same standard: a lighting system that is beautiful, technically sound, and maintainable over the long term.
Landscape Ontario Certified Professionals
Our team includes professionals with credentials recognized by Landscape Ontario, the provincial trade association for horticulture and landscape professionals. That means our advice on pruning, plant health, and landscape maintenance reflects current, professionally validated best practices — not just general contractor opinion.
Serving the Halton Region and Beyond
We serve residential and commercial clients throughout Oakville, Burlington, Mississauga, Halton Hills, Milton, Hamilton, and surrounding communities. Whether you have an existing system that needs attention or you’re considering landscape lighting for the first time, we’d love to help. View our residential gallery for examples of what’s possible.
Is Your Landscape Lighting Ready for Fall?
Late summer and early fall is the perfect time to have your landscape lighting system assessed — and to address any pruning that’s affecting its performance. Our team can walk your property, identify where overgrowth is compromising your lighting, and recommend the right maintenance approach heading into the season when your outdoor lighting matters most.
Contact Nite Time Decor today for a free consultation and quote. Call us at 1-800-952-3006 or request a quote online. We serve Oakville, Burlington, Mississauga, Halton, and the Hamilton area.
A comprehensive pruning should happen at least twice a year — once in early spring before the growing season begins, and once in late summer or early fall after the season's growth has peaked. In between, a monthly walkthrough to remove dead material and clear fixture bases is enough to keep things in order. High-growth areas around specific fixtures may need more attention depending on what's planted there.
Yes. Dense, spreading plant material can shift the aim of ground-mounted fixtures, trap moisture around fixture housings accelerating corrosion, physically displace fixtures from their intended positions, and in some cases crack or discolour lenses when pressed against them over time. Keeping plants appropriately pruned back from fixtures is part of basic landscape lighting maintenance.
The 25% rule is a widely accepted guideline in horticulture: never remove more than 25% of a plant's total foliage in a single pruning session. Removing more than this in one pass stresses the plant significantly — it can trigger a flush of weak regrowth, leave the plant vulnerable to disease and pest invasion, and in some cases cause serious long-term decline. If a plant has been significantly neglected and needs major correction, spread the work over two or three seasons rather than attempting it all at once.
As a general guideline, avoid significant pruning after mid-October in Southern Ontario. Pruning stimulates new growth, and any tender new growth produced in late fall won't have time to harden off before the first frost — making it vulnerable to winter damage. For late fall or winter pruning needs, stick to removing dead, damaged, or diseased material only, and save any shaping or thinning for early spring.
Prune first, then have your lighting assessed and adjusted. Pruning changes the sightlines between fixtures and their targets, so any adjustments made before pruning may be incorrect once the plants are shaped. The right sequence is: prune to the desired plant form, then walk the lighting at night to identify what adjustments are needed, then have your lighting maintenance provider make those adjustments.
This is one of the most common landscape lighting maintenance issues we encounter. The solution is a combination of pruning and fixture repositioning. Keep a clear zone of 15–20 cm around any ground-mounted fixture to prevent ground cover from reaching the lens. If ground cover consistently regrows into that zone, it may be worth considering whether the fixture needs to be raised slightly or repositioned. Nite Time Decor can assess this as part of a maintenance visit.
Yes. Our service and maintenance program covers fixture cleaning and inspection, bulb and component replacement, beam and aim adjustment, and system assessments that identify any issues before they become larger problems. We also provide guidance on pruning for lighting effectiveness as part of our maintenance visits. Learn more about our service and maintenance program or call 1-800-952-3006 to schedule a visit.
Walk your property after dark — ideally on a clear night — and compare what you see to how the lighting looked when it was first installed. If specific trees or shrubs seem dimmer than they used to be, if beam patterns have changed, or if there are shadow areas that weren't part of the original design, overgrowth is the most likely cause. Pay particular attention to ground-level fixtures near the base of plants and any tree-mounted fixtures where canopy growth may have shifted sightlines.
Fast-growing perennials like hostas, ornamental grasses, and daylilies can cover ground-level fixtures in a single season. Junipers and cedars spread outward significantly each year and can bury uplights. Climbing plants like Virginia creeper or hydrangea vines will grow over and around any fixture they reach. Deciduous trees that have significantly expanded their canopy since installation can alter the performance of moonlighting fixtures. Any plant that grows quickly or spreads broadly near a fixture should be on your regular pruning watchlist.
When was the last time you saw a night sky full of stars in the city? It’s probably been a while. Stars in the city sky are a rare appearance, and it’s all because of light pollution. Light pollution is a term that’s frequently thrown around, but what does it actually mean? Did you know that your landscape lighting can contribute to pollution?
Nite Time Décor loves everything to do with lighting. That’s why we want to see nature’s lanterns when we look up from our gently illuminated backyards. We’re sure you do too.
At our Oakville residential lighting service, we feel that there is a delicate balance when it comes to getting the right amount of outdoor light. You need to see what you’re doing. But wouldn’t it also be nice to see rest of your yard? Or the stars? If you use your residential landscape lighting in strategic ways, it’s possible to achieve the right amount of light, as opposed to creating unnecessary light pollution.
If you’re ready to take steps towards preventing and decreasing light pollution, read on for tips about how you can adjust your landscape lighting services to accomplish just that.
What is light pollution?
Light Pollution in the Greater Toronto Area
Light pollution is excess lighting in the sky or poor use of artificial outdoor light. It’s what makes stars so difficult to see in the city, and brightens the night sky to be lighter than the natural indigo, to be almost purplish at times.
Light pollution sounds harmless, but in fact it has a several negative side effects for human health. These include hypertension, anxiety, increased headaches, deteriorating or weakened vision, disruption of sleep and, in recent research, a possibility of increasing the chances of cancer development.
In addition, artificial lights disrupts the natural patterns of wildlife.
According to International Dark Sky Association, “Every year millions of birds die colliding with needlessly illuminated buildings and towers. Migratory birds depend on cues from properly timed seasonal schedules.”
Artificial lights can cause birds to migrate too early or too late and miss ideal climate conditions for nesting, foraging and other behaviors.
Luminous pollution has three components:
Light trespass: This is when light is cast where it doesn’t belong or where it isn’t wanted or needed.
Glare: This is when light is too bright. It can be annoying for some people, hazardous in certain cases, and can inhibit some people’s ability to see properly.
Sky glow: This happens when light is projected into the night sky, either directly or by reflection. This can obscure your view of the stars.
Lighting of any kind is expensive enough to run. You don’t want to waste any of your residential landscape lighting by having it shine in unintended areas. By being precise with your lighting, you will not be paying for waste and your landscape lighting will be more visually appealing.
Here are tips to prevent outdoor lighting pollution:
Trim Down your landscape lighting
Sometimes, less really is more. Too many homeowners over illuminate with landscape lighting. Not only does this contribute to pollution, but it can look aesthetically unappealing as well.
Nite Time Décor Oakville recommends that you go for a minimalist look in your landscape lighting. This is a more chic style, and also saves you money and resources. Further, you’ll drastically reduce the amount of light pollution in your neighbourhood by going a little softer on the landscape lighting.
Subtle, softer low voltage lighting is another way to trim down the pollution from your outdoor lighting. These soft glows offer a more subdued, welcoming effect, rather than a bright, prison yard appearance.
Use Dimmer Switches Indoors
Ever thought your lamps were too bright? Wish you could have mood lighting to create a more comfortable, warm feeling in your home? Dimmer switches can accomplish this for you, while also reducing the light pollution surrounding your house.
Turn Off Unnecessary Lights
Down Lights helps prevent light pollution.
If you’re not in a room, why keep it lit up? The same goes for your yard. When you’re not using your lawn, you should keep only those lights on which are necessary for safety and security.
All of your Nite Time Décor Oakville landscape lighting services used for aesthetics can get switched off as soon as the neighbours begin going to bed. In the case of your backyard, your aesthetic lights or those brightening gathering areas don’t need to go on at all when you’re not using the yard.
Flipping off unnecessary lights both inside and outside the house will save you money, resources, and will prevent light pollution in your neighbourhood.
Getting in the routine of shutting off what you don’t need is an all around benefit for your home.
Down Lights Contain Beams
Down lighting is often recommended when using landscape lighting to light up cottages, but the technique works beautifully in the city as well. Down lighting offers a more direct, controlled beam of your outdoor lighting. Rather than shining up into the sky, down lighting centers on a single fixed focus.
We Can Help!
Nite Time Décor is committed to responsible lighting that isn’t wasteful. We can make recommendations or adjust your current Nite Time Decor landscape lighting so you know you are doing your part.
If you would you like to gently illuminate your home and backyard without causing pollution, contact us today to receive a complimentary quote on a new beautiful and professionally installed Nite Time Décor landscape lighting. We serve homeowners throughout Mississauga, Oakville, Burlington, Halton and the Hamilton region.
You’ve worked hard to create an attractive an inviting oasis in your yard and with a little lighting you can show it off and enjoy it even after the sun goes down. If you want lighting but are concerned about the costs and energy consumption, why not try LED outdoor lighting? Versatile LED lighting can accentuate the beauty of your yard and create an inviting yet secure atmosphere after dark in an energy efficient way.
Outdoor lighting done right creates the right atmosphere to enjoy summer evenings outdoors, improves the aesthetics and curb appeal of your home and enhances the security of your home.
According to recent research and developments in the field of landscape lighting, LED technology is by far the most efficient, economical, and affordable option for your next outdoor lighting upgrade. The equivalent of digital light, LED technology certainly has its advantages – both for users and the planet as a whole.
What is LED Lighting?
Light-emitting diode technology, or LED, has been available for quite some time. In fact, most people are now familiar with its use in computer monitors and flat-screen televisions. Today, LED bulbs are the most popular energy efficient lighting available on the market for both indoor and outdoor uses for many reasons.
Top 13 Benefits of LED Outdoor Lighting
Light up your life with LED technology. The following are just 13 of the top reasons why LED technology is changing the outdoor landscape lighting for the better.
Save Money
Light-emitting diode lights use less energy, involve less waste, and therefore save you more money in the long run.
You may be thinking, “But LED outdoor lighting is so expensive!” And it’s true – the initial cost of installing LED landscape lighting can cost more. But look at the long-term savings. When you crunch the numbers (and, trust us, we have!), over time you save more money with an LED system than a traditional setup – a lot more. Our calculations have told us that for one year of LED outdoor lighting you will save almost $70 compared to conventional lighting, and almost $40 compared to halogen lamps.
LED lights also last longer, meaning that the purchasing costs occur less frequently than with conventional lighting. Throw Nite Time Décor’s lifetime maintenance into the mix, and you’ll enjoy a worry- and hassle-free LED outdoor lighting system for many years to come.
LED Lights have a Long Life
LED Lights offer an incredibly long lifespan. This is by far the biggest advantage to LED lighting technology. If you live on a large property that requires a significant landscape lighting, LED lights will save you money. LED lights and diodes have an operational life of roughly 100,000 hours. That’s roughly 11 years of continuous use, and 22 years at 50% operation! This results in fewer maintenance and repair calls for burnt out bulbs. Imagine only having to change your bulbs once every decade!
LED Lighting are Energy Efficient
LEDs are easily the most efficient way to illuminate the night, thanks to an estimated energy efficiency rating of 80%-90%. This means that less than 20% of the energy is lost; compare this to traditional incandescent lightbulbs, which operate at the opposite efficiency (20% with an 80% rate of energy loss), and it’s easy to see why our Burlington landscape lighting experts recommend this durable lighting option.
LED Lights are 100% Recyclable
There’s a reason that LED lights are considered to be the most environmental choice. Not only do they allow you to expend less energy, but they are also made without the use of toxic chemicals. Fluorescent light bulbs contain materials like mercury, which is well known for its dangerous side effects. LED lights are free of toxic chemicals and are thus better for the environment. They are also 100% recyclable and will help you to reduce your carbon footprint.
Outfitting your home with LED landscape lighting allows you to decrease your carbon footprint, eliminate costly bulb purchases and changes, and reduce your lighting bill.
LED Lights have Less Waste
And don’t forget about that extended lifespan. Just one LED bulb in your landscape lighting system can save the material and production of 25 incandescent bulbs. And this will create less waste over the lifetime of your outdoor lighting system.
LEDs are Strong and Sturdy
LED lightbulbs are manufactured to withstand some of the roughest and toughest conditions imaginable. The fact that they do not contain filaments, are resistant to shock, vibrations and external impacts makes them a great choice for landscape lighting installations.
LED Lights Insect Control
LED amber lights don’t attract insects like regular incandescent lights do. With LEDs you can enjoy your outdoor space without being eaten by bugs.
Zero Emissions
LED lights give off very little heat. In fact, they produce zero UV emissions. This enables them to stay cool and efficient, unlike those old conventional lights. This reduces the amount of wear on your landscape lighting fixtures over time.
Flexible Design Options
LEDs are extremely flexible lighting tools and can be designed in a way that creates a warm and inviting ambiance.
LEDs are available in a wide array of colours and fixture styles. Your space can be customized to meet your exact needs. By varying fixtures and colours you can create a space that is functional, beautiful and energy efficient.
Since they don’t emit a lot of heat, they can easily be grouped together to create efficient illumination.
Outdoor landscaping LEDs can also be dimmed, creating a controlled lighting display such as whimsical lighting for parties, or dim mood lighting for small, cozy nights on the patio.
See the beautiful design options for yourself, check out our gallery to see some of the most stunning outdoor landscaping lighting designs we’ve created over the years.
Weather and Temperature Resistant
Since LEDs are highly durable, they’re ideal for operation under cold and low outdoor temperatures. As such, there’s no need to worry when it starts to snow here in Ontario. Your LED lighting system will continue to shine on, even when the barometer begins to plummet.
Control Over Light Distribution
LED bulbs are designed to focus their light. This means that fixtures can be directed to a specific location without the aid of external reflectors. This results in clear, direct light application.
Immediate Illumination
LED lights brighten up instantaneously. Simply flip the switch and your landscape lighting design will light up the night.
Low-Voltage Power
LED landscape lighting systems don’t require an awful lot of power to function properly and that’s another great way to save on your energy bills!
In Summary
LED lights are easily the most energy efficient and cleanest form of eco-friendly illumination.
Outfitting your home with LED landscape lighting allows you to decrease your carbon footprint, eliminate costly bulb purchases and changes, and reduce your lighting bill. Furthermore, LED lights are designed to operate at their best in both extreme heat and extreme cold, making them perfectly suited to Ontario’s extreme climate. You won’t be left in the dark regardless of the season
Put the power of LEDs to work for you. Contact one of our Burlington landscape lighting experts today to learn more about our powerful LED landscape lighting designs.
We proudly serve residential and commercial properties in Ancaster, Dundas, Burlington, Mississauga, Oakville and the Halton and Hamilton Regions.
Protecting your landscape lighting from the elements. Outdoor lighting in the Halton and Hamilton region are exposed to all kinds of adverse weather. Because of this, outdoor lighting takes a heavier beating than interior lighting. Luckily, there are things you can do, both while designing your landscape lighting and after your lights have been installed, to make sure you get the most out of your property illumination.
Here’s are 5 tips on how you can protect your landscape lighting from the elements:
Choose an Appropriate Location
Placing your lights out in the open is probably not the best idea when trying to protect your fixtures. When designing your system, try to place the fixtures where they can be shielded from rain, snow, and violent winds. For instance, if you have one of our wash lights illuminating a wall, place it as close to an overhang as you can.
If you have landscape lights in your yard, try to place them near shrubbery, trees, or other overhangs that will protect them from Mother Nature’s fierce mood swings.
Remember that even if it’s bright and sunny when you install your lights, it won’t be year round. Keep in mind future snow and rain conditions, particularly if your property has minimal protection from adverse weather.
Be careful of high winds and trees
If you have a lot of top-heavy trees in your yard, it may be time to thin them out. Top-heavy trees can be a danger to your house and landscape during aggressive winds.
Don’t want to get rid of your trees? You don’t have to. The best thing to do is to prune them simply by thin the branches out a bit. This will allow wind to blow through the branches, rather than push up against a thick tree. Thinning out your trees’ branches will prevent a fall that could cause major damage to your landscape lighting and yard.
Protective treatments in your landscape lighting services
Rain-X Original glass treatment and Rain-X Anti-Fog will help keep your lights clean and clear. Use these or similar products on the glass of your fixtures to protect them. Note that Rain-X Original should be used on the outside of the glass areas, and Anti-Fog should be applied to the inside of the glass.
Invisa-Shield is another staple in protecting your landscape lighting from those nasty elements. This is a metal sealant that should be applied to the fixture around the bulb. If you want to increase the effectiveness of this treatment, wax your fixtures before applying Invisa-Shield. And for extra protection, use Armor-All on rubber gaskets and sockets.
One of the most important steps in keeping your landscape lighting safe is to maintain your fixtures. Thankfully, with our warranties and lifetime maintenance, you can be sure that your landscape lighting system won’t be neglected.
Invest in a light shield
Light shields are clear boxes that can cover the fixtures that are out in the open. Make sure upon purchasing a light shield that it is the right size. It should be sealed to prevent moisture entering the box to damage your light.
Protect from the Snow
What should you do if your landscape light fixtures are buried beneath the snow after a big winter storm?
The heat from the lights will not melt the snow because the LED bulbs that are commonly used in professional outdoor lighting does not emit enough heat. We suggest that you take a broom to sweep the snow off the lens so that the light can shine its brightest again.
Contact Nite Time Decor
Follow these 5 tips to protect your outdoor lighting from the harsh Halton and Hamilton area weather elements. Looking to upgrade to a beautifully designed and professionally installed landscape lighting system? Nite Time Decor can help, from choosing quality materials to planning out the exact placement for each light. Our team of professionals can help you make these important decisions. Contact us today for a free quote and find out how we can help you create the landscape lighting design of your dreams.
Some homeowners have a difficult time ensuring that their mulch and landscape lighting system coexist peacefully. Fortunately, there are a number of maintenance techniques available to improve this process.
From heat management to fixture placement, here’s what you need to know when it comes to handling mulching around your landscape lighting system.
Why Mulch?
Mulch is extremely beneficial for landscaping as it acts as a natural cover and insulation layer to protect the soil from the sun which allows for water retention and weed prevention.
Mulch is also a beautiful addition to the aesthetics of your home. With that being said, it’s important that you don’t over-mulch as this can encourage unwanted insect infestations and can cause the soil to absorb too much moisture.
Problems with Mulching Your Landscape Lighting
In short, mulch is wood, and lighting fixtures produce heat. This can be a tricky combination if it isn’t properly maintained. That’s not to say it’s impossible to have both mulch and landscape lighting on your property. The trick is making sure the mulch isn’t covering any fixtures.
Lights give off heat that needs a way to escape. If mulch is covering the lighting fixtures, that heat will be locked in, forcing the mulch to begin to smolder and smoke. If left for an extended period of time, the fixture could become hot enough to melt the PVC composite on your landscape lighting fixtures, and possibly burn off the insulation around the wires. Needless to say, this could cause an immense amount of damage – all of which could have been avoided with a little patience and maintenance.
Warning! If too much heat is allowed to build up under too large a pile of mulch, a fire may even start, causing far more serious damage than a few broken lights and wires.
How can this be avoided?
It pays to be cautious with your landscape lighting maintenance. If someone else is applying your mulch, make sure to tell them exactly where each fixture is. It’s also a good idea to check once the mulch is applied to ensure that no mistakes have been made or light fixtures have been accidentally buried.
If there’s been a storm recently, take the time to survey any damage to your gardens and mulch. Always make sure that mulch hasn’t blown onto your landscape lighting fixtures after a period of high winds or rain.
Clear off any mulch that is covering fixtures. This quick and easy task will save you time and money on your landscape lighting maintenance in the long run.
Fortunately, Nite Time Decors lighting products and fixtures come with a covering over any light bulbs. This will prevent mulch from directly touching the light, creating an efficient heat barrier. It’s generally a good idea to go with energy efficient LED lighting systems, as they heat up less than conventional light bulbs.
Don’t buy cheap mulch. While buying affordable mulch is always recommended, purchasing the cheapest is not. It is usually priced at a bargain basement price because of its weight. The cheaper the mulch, the lighter it is and the more likely it will be blown around in a storm.
Not only does this ruin the aesthetics of your lawn, but it also increases the odds of the mulch blowing onto your landscape lighting fixtures.
If you take these simple precautions, you shouldn’t have any problem maintaining a beautifully manicured and mulched garden, as well as a safe and efficient landscape lighting system.
Best 5 Tips for Preventing Damage to Your Outdoor Lighting System
Outdoor lighting is one of the best ways to highlight your home’s beauty, boost curb appeal, and increase security around your property. But if you’ve had your system installed for a few years and haven’t been keeping up with maintenance, you may have noticed that it’s not working as well as it once did. That’s perfectly normal—outdoor lighting systems require occasional care to keep them shining bright.
To help you get the most out of your investment, our team of professional lighting specialists at Nite Time Décor Oakville has put together a comprehensive guide on how to prevent damage to your outdoor lighting system and keep it looking great year-round.
Why Protecting Your Outdoor Lighting Matters
A high-quality landscape lighting system offers more than just illumination. When properly maintained, your lighting can:
Boost curb appeal: Professionally designed outdoor lighting enhances architectural details, gardens, and pathways.
Improve home security: A well-lit property discourages intruders and increases visibility around your home.
Increase safety: Pathway lights prevent trips and falls, especially in darker areas or during icy conditions.
Create ambiance: Outdoor lighting transforms your backyard into a welcoming space for entertaining or relaxing.
These benefits, however, rely on your system being in good working condition. Without regular care and preventative measures, your fixtures may suffer from damage caused by weather, landscaping tools, or everyday wear and tear. The good news? Preventing most outdoor lighting damage is simple and cost-effective with the right steps.
Outdoor Lighting Prevention Tips
Here are some of the best tips for protecting your outdoor lighting system and extending its lifespan.
Keep Landscape Lighting Safe from Lawnmowers and Weed Trimmers
One of the most common causes of damage to outdoor lighting is lawn care. Lawnmowers, weed whackers, and even stray debris can crack, dent, or completely break your fixtures.
How to prevent this:
Place a bucket or protective cover over each fixture before mowing or trimming.
Keep fixtures a safe distance from areas where you frequently trim grass.
Consider installing lights slightly above ground level to reduce the risk of accidental hits.
By taking a few extra minutes during yard work, you’ll save yourself from costly repairs or replacements.
Protect Outdoor Lighting from Weather and Fertilizer
Canadian weather is tough on outdoor lighting systems. Rain, snow, ice, and even fertilizer chemicals can wear down your fixtures over time.
Preventative steps include:
Apply protective treatments: Use glass treatments to reduce scratching, fogging, or etching on lenses.
Choose strategic placement: Install lights under awnings, eaves, or overhangs for natural protection.
Wipe down monthly: Clean your fixtures with a damp cloth to prevent dirt and grime buildup.
Inspect after storms: Following heavy rain, snow, or ice, check for water accumulation, corrosion, or frozen lenses.
Even small actions like drying fixtures after a storm can prevent moisture damage and prolong your system’s life.
Install Lighting Away from Heavy Foot Traffic
Sometimes the best prevention is strategic placement. Fixtures placed along busy walkways or high-traffic garden areas are more likely to be knocked over or stepped on.
Best practices include:
Position lights at the edges of walkways rather than in the center.
Use downlights or wall-mounted fixtures to illuminate areas without creating obstacles.
Place decorative fixtures in low-traffic areas to showcase gardens or trees.
Additionally, installing your system with timers or light sensors ensures consistent performance while also deterring unwanted visitors. Lights that turn on automatically at dusk send the message that someone is always home.
Perform Regular Outdoor Lighting Maintenance
Routine maintenance is one of the easiest and most effective ways to prevent outdoor lighting damage. A simple property walkthrough can help you catch issues early before they become major problems.
Maintenance checklist:
Inspect bulbs for burnouts or dimming.
Straighten any tilted fixtures.
Look for exposed wires or damaged connections.
Clear away debris, snow, or ice buildup.
Trim back shrubs and branches that may block light or scratch fixtures.
Even dedicating 15 minutes once a month to checking your system can dramatically extend its lifespan and ensure consistent performance.
Use Quality Fixtures and Professional Installation
The foundation of a reliable outdoor lighting system starts with the right materials and proper installation. Cheaper fixtures or poorly planned designs are far more prone to damage.
In addition to year-round care, each season brings unique challenges for outdoor lighting:
Spring: Check for damage caused by snow, salt, or frost. Clean lenses and adjust fixtures displaced by ground shifting.
Summer: Protect fixtures from lawn care tools and excessive fertilizer exposure. Ensure timers are adjusted for longer daylight hours.
Fall: Clear away fallen leaves and debris. Prepare your system for earlier sunsets with timer adjustments.
Winter: Remove snow and ice buildup carefully. Avoid using harsh tools to chip away frozen layers, which can crack fixtures.
By tailoring your maintenance routine to each season, you’ll prevent small issues from escalating into costly repairs.
Common Outdoor Lighting Problems to Watch For
Even with careful prevention, some issues may arise. Keep an eye out for:
Flickering lights: Often caused by loose connections or moisture intrusion.
Dim or burned-out bulbs: Replace promptly to prevent system strain.
Corrosion on fixtures or wires: Clean gently and apply protective coatings if needed.
Tripped breakers: May signal an overloaded circuit or damaged wiring.
Catching these issues early will save money and keep your system running smoothly.
Work with Nite Time Décor Oakville
Protecting your outdoor lighting system begins with smart design choices and consistent care. From selecting durable materials to planning fixture placement and scheduling routine maintenance, every step makes a difference in extending the life of your system.
Contact us today to schedule a consultation and learn how we can bring your outdoor space to life—while ensuring your system is protected from damage for years to come.
Frequently Asked Questions (FAQs)
Q1: How often should I maintain my outdoor lighting system?
It’s best to perform a quick inspection once a month. Check for burned-out bulbs, tilted fixtures, exposed wires, and dirt buildup. Seasonal deep checks are also recommended to prepare your system for changing weather conditions.
Q2: Can outdoor lighting be damaged by lawn care equipment?
Yes. Lawnmowers and weed trimmers are a common cause of broken fixtures and cracked lenses. To prevent this, cover fixtures before mowing or keep them placed a safe distance from grassy areas.
Q3: How do I protect my outdoor lighting from snow and ice?
After a snow or ice storm, gently clear away buildup and dry fixtures to prevent moisture damage. Avoid using sharp tools that could scratch or crack the glass.
Q4: Why should I hire a professional for outdoor lighting installation?
Professionals use high-quality, weather-resistant fixtures and ensure proper wiring, placement, and design. This reduces the risk of damage and ensures your lighting system lasts longer.
Q5: What’s the biggest benefit of outdoor landscape lighting?
Outdoor lighting not only enhances curb appeal but also boosts safety and security by deterring intruders and illuminating pathways and entry points.
Contact Nite Time Décor Oakville
Preventing damage to your landscape lighting system starts with properly creating your design. From choosing quality materials to planning out the exact placement for each light, you’ll want to be sure you are making the right choices. Our team of landscape lighting professionals can help you make these important decisions. If you reside in Mississauga, Oakville, Burlington, Ancaster, Halton or the Hamilton regions, contact us today to find out how we can help you create the landscape lighting design of your dreams.
Outdoor landscape lighting does more than illuminate your property—it enhances curb appeal, improves safety, highlights your landscaping, and allows you to enjoy your outdoor living spaces long after the sun goes down. However, exposure to dirt, pollen, insects, moisture, and harsh Canadian weather can quickly leave your fixtures looking dull and reduce the quality of light they produce.
The good news is that cleaning your outdoor lighting fixtures is simple, inexpensive, and can significantly extend the life of your lighting system. Regular maintenance also gives you the opportunity to spot small problems before they become costly repairs.
Whether you have pathway lights, garden lights, spotlights, deck lighting, copper fixtures, or decorative lanterns, these expert maintenance tips will help keep your landscape lighting looking and performing like new throughout every season.
At A Glance: How Do You Clean Outdoor Landscape Lighting Fixtures?
The best way to clean outdoor landscape lighting fixtures is to turn off the power, remove dirt and debris with warm soapy water and a soft cloth, clean the glass lenses, inspect the fixture for damage, allow all components to dry completely, and then reassemble and test the system. Cleaning your landscape lighting two to four times per year helps improve brightness, extend fixture life, reduce maintenance costs, and keep your property looking its best.
Why Cleaning Your Landscape Lighting Matters
Many homeowners don’t think about maintaining their landscape lighting until they notice their lights becoming dim or dirty. Unfortunately, by then, accumulated dirt, insect debris, and moisture may already be affecting the performance of the fixtures.
Routine landscape lighting maintenance provides several important benefits:
Brighter, clearer illumination
Improved curb appeal
Longer lifespan for fixtures and LED bulbs
Better energy efficiency
Early detection of wiring or moisture problems
Reduced repair costs
Improved safety around walkways, stairs, and entrances
Professional landscape lighting systems represent an investment in your home. Spending just an hour or two on seasonal maintenance can help protect that investment for years to come.
20 Expert Tips for Cleaning Outdoor Landscape Lighting
1. Turn Off the Power Before You Begin
Safety should always come first.
Before cleaning any outdoor lighting fixture, switch off the transformer or disconnect the power source. Never attempt to clean fixtures while electricity is flowing through the system.
If you’re unsure how your low-voltage landscape lighting system is powered, contact the professionals at Nite Time Décor before beginning any maintenance.
2. Read the Manufacturer’s Cleaning Instructions
Before using any cleaning products, check the manufacturer’s recommendations.
Some finishes—including copper, brass, powder-coated aluminum, and stainless steel—require specific cleaning methods. Using harsh chemicals or abrasive cleaners may damage the finish or void the manufacturer’s warranty.
If your lighting system was installed by Nite Time Décor, we’re always happy to answer questions about proper maintenance and cleaning.
3. Gather the Right Cleaning Supplies
Fortunately, you don’t need specialized equipment.
Most outdoor lighting fixtures can be cleaned using:
Warm water
Mild dish soap
Two clean buckets
Soft microfiber cloths
A sponge
A soft toothbrush
Glass cleaner (if recommended)
Screwdriver (if required)
Copper polish (for copper fixtures)
Avoid steel wool, abrasive pads, bleach, or harsh chemical cleaners unless specifically recommended by the manufacturer.
4. Use a Safe, Stable Ladder
If your wall lights or elevated fixtures are out of reach, use a sturdy ladder placed on level ground.
Always maintain three points of contact while climbing, and never overreach while cleaning.
If a fixture is difficult to access safely, it’s best to have it serviced by a professional.
5. Remove Any Removable Components
Most landscape lighting fixtures are designed for easy maintenance.
Carefully remove:
Glass lenses
Globes
Protective shields
Decorative covers
Grilles
Place all removable parts somewhere safe before beginning the cleaning process.
6. Remove the Bulb
Take out the light bulb before washing the fixture.
This helps prevent accidental damage and keeps moisture away from the electrical socket.
If your LED lamp has reached the end of its life, now is an excellent time to replace it.
Nite Time Décor’s premium LED landscape lighting typically lasts around 10 years under normal operating conditions, making replacements infrequent.
7. Wash the Fixture Using Warm Soapy Water
Fill one bucket with warm water and mild dish soap.
Fill a second bucket with clean rinse water.
Using a soft sponge or microfiber cloth, gently clean both the removable parts and the fixture body.
This removes dirt, pollen, dust, insect residue, bird droppings, spider webs, and other debris that can reduce light output.
8. Avoid Harsh Cleaning Products
Not every cleaner is suitable for outdoor lighting.
Chemical cleaners may leave behind residue that makes glass appear cloudy or dull.
Some abrasive products can scratch lenses or permanently damage painted finishes.
If you prefer a natural cleaning solution, a mixture of warm water and white vinegar can work well on glass, but always check the manufacturer’s recommendations first.
9. Clean Around Electrical Components Carefully
When cleaning the fixture body, be especially careful around sockets and electrical connections.
Never allow water to enter:
Lamp sockets
Wire connections
Transformers
Junction points
Moisture inside electrical components can lead to corrosion, shorts, and premature fixture failure.
10. Rinse and Dry Everything Thoroughly
Once all dirt has been removed, rinse every washable component with clean water.
Allow all parts to dry completely before reassembling the fixture.
Even small amounts of trapped moisture can lead to corrosion, condensation inside the lens, or electrical issues later on. Taking a few extra minutes to let everything dry properly can help extend the life of your lighting system.
11. Polish Metal Fixtures for Added Protection
Once your fixtures are clean and completely dry, consider applying a protective polish or wax to metal finishes if recommended by the manufacturer.
A quality metal polish can help protect fixtures from moisture, oxidation, and everyday wear while restoring their original shine. Be sure to use a product that is appropriate for the fixture’s material, such as copper, brass, or stainless steel.
12. Clean or Replace Light Bulbs
Before reinstalling your bulbs, wipe them gently with a soft, slightly damp microfiber cloth to remove dust and dirt.
Avoid getting moisture on the electrical base that screws into the socket.
If you notice a bulb flickering, dimming, or no longer working, replace it with the manufacturer’s recommended LED bulb to maintain consistent light output and energy efficiency.
13. Reassemble Your Fixtures Carefully
Once every component is clean and completely dry, reassemble your fixture.
Ensure that:
Glass lenses are securely installed.
Gaskets and seals are properly seated.
Screws are snug but not over-tightened.
Fixtures remain level and properly aimed.
Proper reassembly helps prevent moisture from entering the fixture and keeps your lighting system operating reliably.
14. Inspect Every Fixture While You’re Cleaning
Cleaning provides the perfect opportunity to inspect your landscape lighting system for signs of wear or damage.
Look for:
Cracked glass
Loose mounting hardware
Corrosion
Water inside fixtures
Leaning pathway lights
Damaged lenses
Rust or deteriorating finishes
Identifying small issues early can help prevent larger repairs and extend the life of your landscape lighting system.
15. Check the Wiring
Outdoor wiring is exposed to changing temperatures, moisture, gardening equipment, pets, wildlife, and normal wear over time.
While inspecting your system, look for:
Frayed wires
Exposed cable
Loose wire connections
Animal damage
Damaged connectors
If you discover damaged wiring, avoid using the affected fixture until it has been repaired by a qualified professional.
16. Trim Plants Around Your Lighting
Landscape lighting works best when fixtures have a clear path to illuminate your home’s architectural features and landscaping.
As plants grow throughout the season, they can block light, create unwanted shadows, or even trap moisture around fixtures.
Take a few minutes to:
Trim shrubs
Prune tree branches
Cut back ornamental grasses
Remove weeds around fixtures
Keeping plants properly maintained allows your lighting design to shine exactly as it was intended. For more information, read our Pruning Tips for Landscape Lighting article.
17. Check Fixture Positioning
Oakville winters can be tough on landscape lighting.
Frost, heavy rain, snow removal, lawn maintenance, and freeze-thaw cycles can cause fixtures to shift or lean.
Walk around your property after cleaning and ensure each fixture is still aimed correctly.
Minor adjustments can dramatically improve the appearance of your nighttime landscape.
18. Inspect Your Transformer
Your transformer is the heart of your low-voltage landscape lighting system.
While performing seasonal maintenance, inspect it for:
Moisture
Corrosion
Loose wiring
Dirt or insect nests
Signs of overheating
If you notice any unusual issues, contact a landscape lighting professional rather than attempting electrical repairs yourself.
19. Consider Upgrading Older Fixtures
If your lighting system is more than 10 to 15 years old, cleaning alone may not restore its original appearance or performance.
Older fixtures may have:
Outdated technology
Corroded components
Inefficient lighting
Faded finishes
Poor beam quality
Modern LED landscape lighting offers improved energy efficiency, longer lifespan, better colour temperature, and superior illumination while requiring less maintenance.
One of the easiest ways to protect your investment is to inspect and clean your lighting system several times each year.
A simple seasonal maintenance routine helps keep your landscape lighting looking beautiful while reducing the likelihood of unexpected repairs.
Many homeowners choose to clean their lighting:
Early spring
Mid-summer
Early fall
Before the holiday season
How to Clean Copper Landscape Lighting Fixtures
Copper fixtures naturally develop a rich patina over time. Some homeowners love this aged appearance, while others prefer to restore the original polished finish.
Before cleaning copper, always review the manufacturer’s recommendations.
If you prefer the natural weathered patina, simply clean the fixture with mild soap and water and avoid polishing.
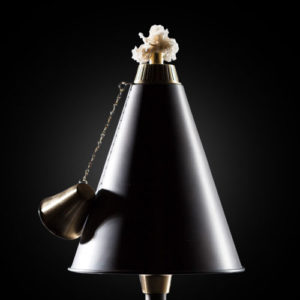
Cleaning Gas and Tiki Torch Lighting
If your landscape includes gas-powered or tiki torch lighting, maintenance is slightly different.
Before cleaning:
Turn off the gas supply.
Allow the fixture to cool completely.
Ensure there are no combustible materials nearby.
Wash the exterior using warm water, mild soap, and a soft cloth.
Natural gas and propane tiki torches burn relatively cleanly but may develop carbon buildup around the burner assembly. Cleaning these areas periodically helps maintain a consistent flame and attractive appearance.
Seasonal Landscape Lighting Maintenance Checklist
Cleaning your fixtures is only one part of maintaining a beautiful outdoor lighting system.
While you’re working outside, also take a few minutes to:
✔ Test every light fixture
✔ Replace burned-out bulbs if needed
✔ Check that fixtures are level and properly aimed
✔ Remove leaves, mulch, and debris around fixtures
✔ Inspect wiring and cable connections
✔ Clean lenses for maximum brightness
✔ Prune trees, shrubs, and ornamental grasses
✔ Check your transformer for proper operation
✔ Look for moisture inside fixtures
✔ Schedule repairs before small issues become expensive problems
Performing these simple maintenance tasks just a few times each year can significantly extend the lifespan of your outdoor lighting system.
Plan Your Outdoor Lighting with the Seasons in Mind
Your landscape changes throughout the year—and your lighting should complement those changes.
Trees fill in during spring and summer, gardens bloom, and new landscaping features become focal points. During fall and winter, bare branches and seasonal décor create an entirely different look.
A professional lighting adjustment can ensure your fixtures continue highlighting your home’s best features in every season while maintaining balanced, even illumination.
If you’ve recently added gardens, patios, retaining walls, water features, or outdoor living spaces, now may also be the perfect time to expand your lighting system.
Invest in Quality Landscape Lighting
One of the best ways to reduce maintenance over the long term is to invest in professionally designed, high-quality landscape lighting.
Premium fixtures are built to withstand Ontario’s changing weather conditions and typically offer:
Longer-lasting LED technology
Durable finishes
Better corrosion resistance
Improved light quality
Greater energy efficiency
Lower maintenance requirements
A professionally installed landscape lighting system not only enhances your home’s curb appeal but also provides years of reliable performance with minimal upkeep.
Need Help Maintaining Your Landscape Lighting?
Regular cleaning and seasonal maintenance will keep your outdoor lighting performing at its best, but some tasks are better left to experienced professionals.
Whether you need fixture repairs, lighting adjustments, LED upgrades, or a completely new landscape lighting design, the team at Nite Time Décor Oakville is here to help.
Contact us today to schedule your complimentary consultation and discover how professionally designed landscape lighting can transform your home after dark.
Frequently Asked Questions About Cleaning Outdoor Landscape Lighting
Most outdoor landscape lighting systems should be cleaned two to four times per year. Homes surrounded by mature trees, gardens, or areas with high pollen, dust, or insect activity may benefit from more frequent cleaning. Regular maintenance helps maximize brightness, protects the finish of your fixtures, and extends the life of your lighting system.
The safest method is to turn off the power, remove dirt and debris using warm water, mild dish soap, and a soft microfiber cloth, then allow all components to dry completely before reassembling the fixture. Avoid abrasive cleaners or harsh chemicals that may damage glass lenses or protective finishes.
A diluted mixture of white vinegar and water can help remove mineral deposits and water spots from glass lenses. However, vinegar should only be used if recommended by the fixture manufacturer, as some finishes may be sensitive to acidic cleaners.
Yes. Removing the bulb makes cleaning easier and helps prevent moisture from entering the electrical socket. Before reinstalling the bulb, wipe it gently with a clean microfiber cloth and ensure both the bulb and fixture are completely dry.
High-quality LED landscape lighting is designed for long-term performance. Most professional-grade LED bulbs last 40,000 to 50,000 hours, which often translates to 10 years or more under normal residential use. Premium fixtures themselves can last even longer when properly maintained.
Outdoor lighting fixtures are constantly exposed to dirt, pollen, dust, moisture, insects, hard water, and UV rays. Over time, this buildup can reduce light output and make lenses appear cloudy. Regular cleaning restores brightness and helps preserve the appearance of your fixtures.
No. Pressure washers can force water into electrical connections, damage seals, scratch lenses, and loosen fixtures. Hand cleaning with mild soap and water is the safest and most effective cleaning method.
For routine maintenance, use warm water and mild soap. To remove tarnish, many manufacturers recommend rubbing the fixture with a lemon dipped in salt, then rinsing thoroughly and applying a copper polish if desired. If you enjoy the natural aged patina, simply clean the fixture without polishing.
While insects are naturally attracted to light, keeping fixtures clean and tightly sealed can reduce buildup inside the fixture. Modern LED landscape lighting also attracts fewer insects than older incandescent bulbs because LEDs produce less heat and emit different wavelengths of light.
Absolutely. Ontario winters can be tough on outdoor lighting systems. Snow, ice, freeze-thaw cycles, lawn maintenance, and shifting soil can move fixtures or damage wiring. A spring inspection helps identify any issues before the busy outdoor entertaining season begins.